
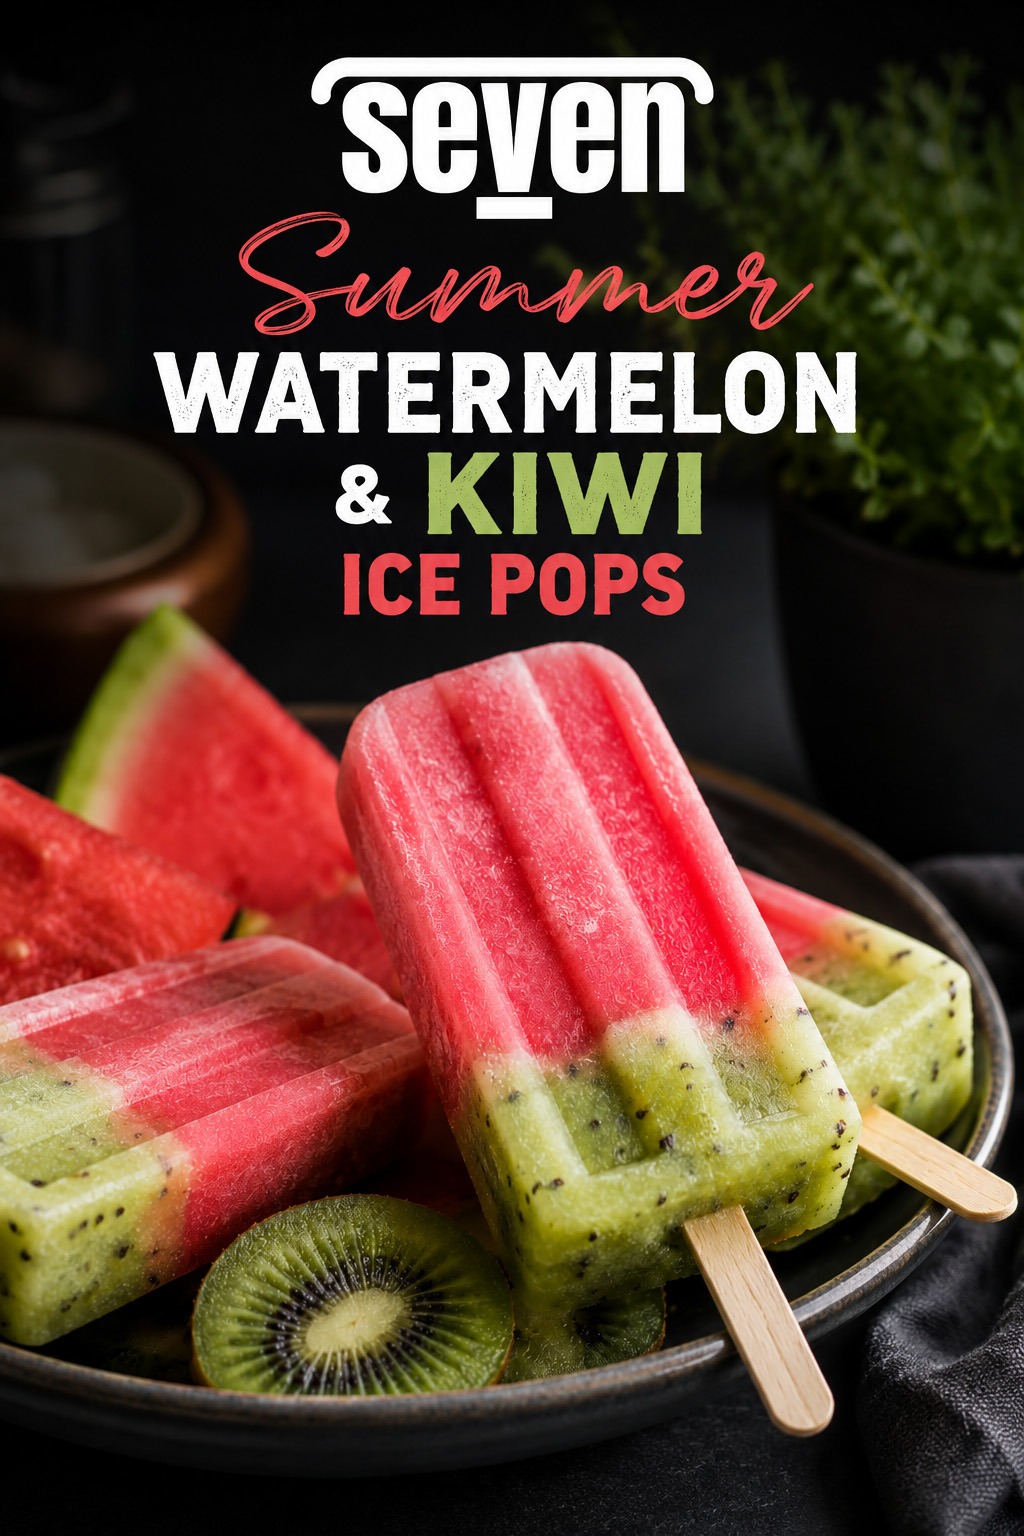
Nothing captures the taste of summer quite like these Summer Watermelon & Kiwi Ice Pops. Bursting with naturally sweet, juicy fruit and vibrant colour, they’re a wonderfully refreshing way to cool down on warm afternoons. Made with just a handful of fresh ingredients, these frozen treats are as wholesome as they are beautiful—perfect for children and adults alike.
Whether you’re hosting a garden gathering, relaxing in the sunshine, or simply looking for a healthier alternative to shop-bought ice lollies, these homemade pops are guaranteed to disappear fast. Keep a batch tucked away in the freezer and you’ll always have the perfect summer treat ready to enjoy.
Just a little warning—I have a feeling this is only the beginning. The popsicle moulds are officially back in action, the freezer is filling up with colourful creations, and there’s no shortage of delicious ideas waiting to be turned into icy perfection. Consider this the start of a very refreshing summer.
Prepare
Cook
Serving
Ingredients
Ready to fill your freezer with homemade ice pops? Once you’ve made your first batch, you’ll wonder why you ever bought them from the supermarket. With just a few simple essentials, you’ll be creating endless combinations of fresh, fruity flavours all summer long.
What You’ll Need
-
A quality ice pop mould – A sturdy mould with reusable handles or sticks makes all the difference, producing perfectly shaped pops that release easily every time.
-
Extra wooden popsicle sticks – Always handy to keep a spare pack nearby if your mould doesn’t include reusable ones.
-
A measuring jug with a pouring spout – Ideal for filling the moulds neatly without drips or waste.
-
A blender or food processor – Essential for transforming ripe fruit into silky-smooth purées.
-
Fresh, ripe fruit – The better the fruit, the better the finished ice pops. Choose fruit that’s naturally sweet, juicy and full of flavour.
Do Homemade Fruit Ice Pops Need Sweetener?
Not always. Perfectly ripe fruit can often provide all the sweetness you need. However, a small drizzle of honey or a spoonful of sugar isn’t simply about making the pops sweeter—it helps lift and intensify the natural fruit flavours, giving them a brighter, more vibrant taste.
It’s also worth remembering that freezing naturally dulls our perception of sweetness. A recipe that tastes perfectly balanced before freezing can seem noticeably less sweet once frozen solid. That’s why even a modest amount of sweetener can make a remarkable difference, creating ice pops that taste fresher, fruitier and more satisfying without becoming overly sweet.
As a guide, always taste your fruit mixture before pouring it into the moulds. If it tastes just a little sweeter than you’d normally enjoy, it’ll usually freeze into the perfect balance.
Method
-
Prepare the watermelon.
Cut the watermelon into thick slices, remove the rind, and chop the flesh into large chunks. Blend until completely smooth, giving the mixture a final pulse if needed to eliminate any remaining pieces. You should have approximately 500ml (2 cups) of silky watermelon purée. -
Create the first layer.
Divide the watermelon purée evenly between 10 ice pop moulds, filling each about three-quarters full. Transfer to the freezer for 30 minutes, or until the surface is lightly set but not completely frozen. -
Blend the kiwi.
Peel the kiwis and cut them into chunks before blending until smooth. Taste the purée and, if needed, stir in a little honey to enhance the natural sweetness. You’ll need around 250ml (1 cup) of kiwi purée. -
Finish the ice pops.
Spoon or carefully pour the kiwi purée over the partially frozen watermelon layer, filling each mould to the top. Insert the popsicle sticks—the thick kiwi mixture should hold them upright without difficulty. -
Freeze until firm.
Return the moulds to the freezer for at least 4 hours, or preferably overnight, until the ice pops are completely frozen. -
Unmould and enjoy.
To release the ice pops, dip the outside of the mould into warm (not boiling) water for 5–10 seconds. Gently pull on the sticks. If they’re still firm, dip for a few more seconds, taking care not to leave the mould in the water long enough for the ice pops to begin melting.
Chef’s Notes
For beautifully defined layers, make sure the watermelon mixture has partially frozen before adding the kiwi purée. The slight pause creates a crisp, colourful finish that’s just as impressive to look at as it is to eat.

Print & Share
Summer Watermelon & Kiwi Ice Pops
Keep a batch waiting in the freezer and you'll always have the perfect way to cool down on a warm afternoon. Bursting with juicy watermelon and tangy kiwi, these colourful ice pops are every bit as beautiful as they are delicious—and they're guaranteed to become the first thing everyone reaches for when the sun comes out.
Ingredients
Method
-
Remove the rind from the watermelon and cut the flesh into large chunks. Blend until completely smooth, creating approximately 500ml (2 cups) of vibrant watermelon purée.
-
Pour the watermelon purée into 10 ice pop moulds, filling each to around three-quarters full. Place the moulds in the freezer for 30 minutes, allowing the layer to become lightly set while remaining slightly soft.
-
Peel the kiwi fruits and chop into chunks before blending until silky smooth. Stir in the honey, tasting as you go, until the purée reaches your preferred sweetness. You should have roughly 250ml (1 cup) of kiwi purée.
-
Spoon or pour the kiwi purée over the chilled watermelon layer, filling each mould to the top. Insert the sticks into the centre of each mould—the thick kiwi layer will help keep them perfectly upright.
-
Return the moulds to the freezer for at least 4 hours, or preferably overnight, until the ice pops are completely frozen.
-
To remove the ice pops, dip the outside of the mould into warm water for 5–10 seconds, taking care not to let the water reach the top. Gently pull on the sticks. If needed, dip again for a few more seconds until the pops release cleanly.
-
Tip: For beautifully defined layers, ensure the watermelon purée has partially set before adding the kiwi. Using perfectly ripe fruit will deliver the sweetest flavour, often meaning only a touch of honey—or none at all—is needed.
Discover more from Table Number Seven
Subscribe to get the latest posts sent to your email.