
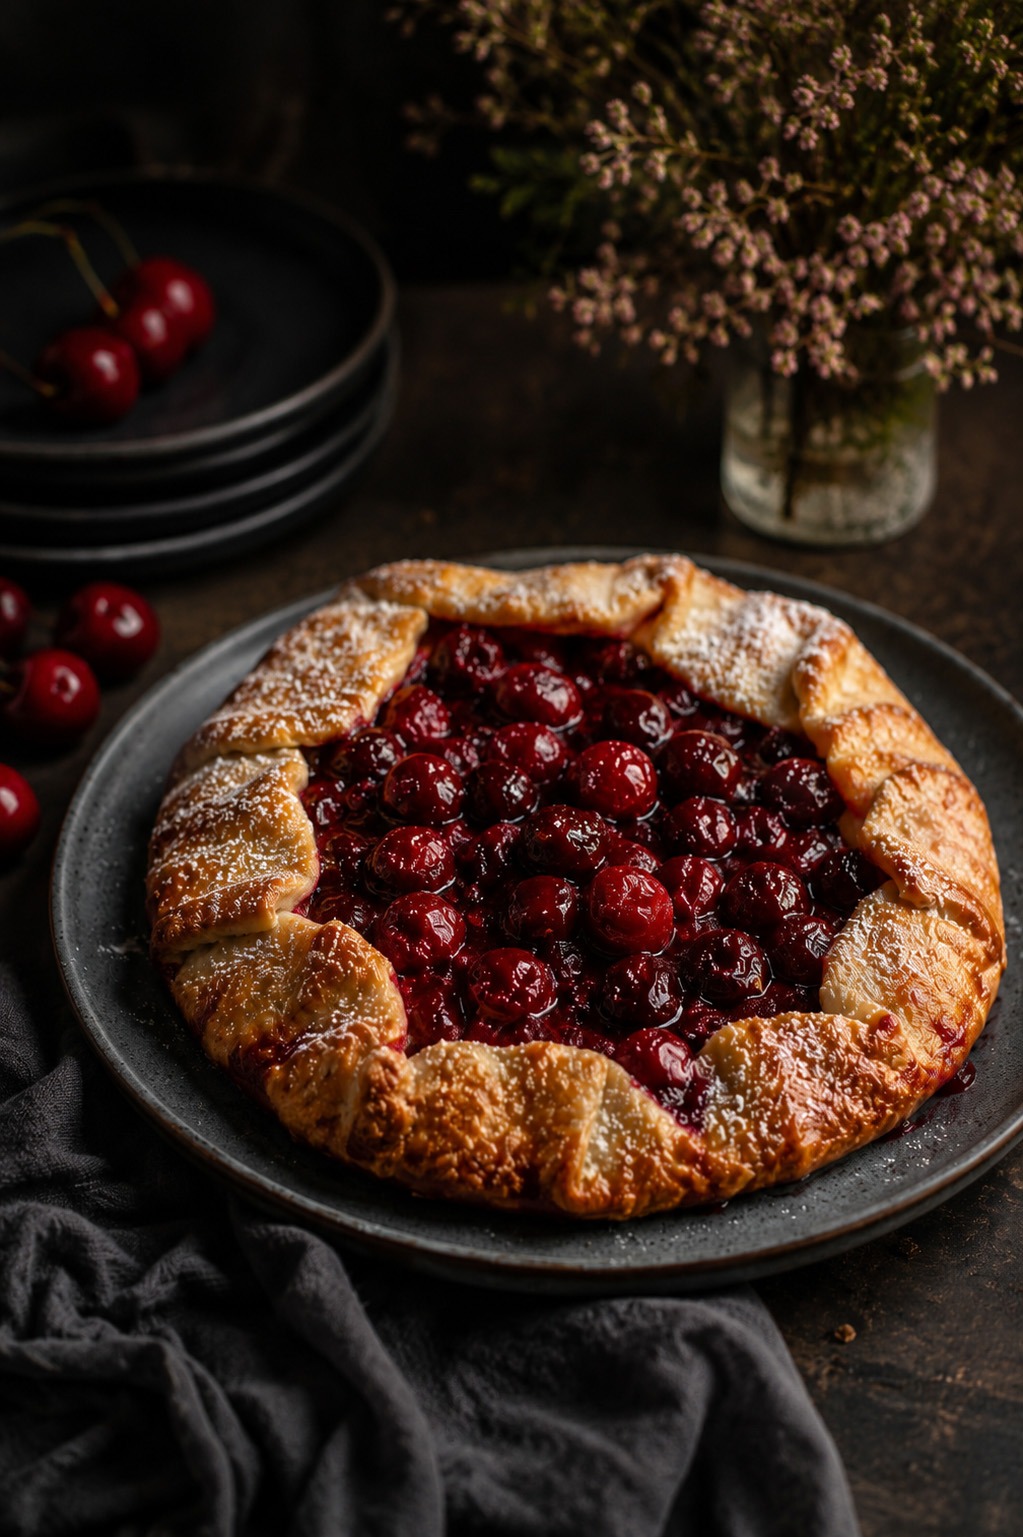
There’s something wonderfully effortless about a cherry galette. No lattice to perfect. No crimped edges to fuss over. Just crisp, buttery pastry folded loosely around fruit at its absolute best.
This version has become my summer favourite — a free-form tart layered with glossy cherries, softened with fragrant vanilla, warmed with a touch of almond extract, and lifted by fresh lemon. As it bakes, the fruit collapses into a rich ruby filling while the pastry turns deeply golden and impossibly flaky around the edges.
It’s the kind of dessert that feels elegant without trying too hard.
Serve it warm from the oven with vanilla ice cream melting into the cherries and it becomes something truly special.
Why You’ll Love This Cherry Galette
Beautifully rustic, effortlessly impressive
A galette has all the charm of a handmade dessert without the precision of a traditional pie. Fold, bake, serve — the more relaxed it looks, the better.
A pastry worth making from scratch
The homemade crust bakes into delicate, buttery layers with crisp edges and a tender bite. It’s simple to make and transforms the whole dessert.
Peak summer flavour
Sweet-tart cherries are the centrepiece here. Combined with almond, vanilla and lemon, every bite tastes bright, rich and unmistakably seasonal.
Made for sharing
Whether served after dinner, brought to a garden gathering or sliced alongside afternoon coffee, this is the sort of dessert people remember.
Choosing the Best Cherries
The beauty of this galette starts with the fruit.
Sour cherries are the traditional choice and create that perfect balance of sweetness and sharpness that makes each slice feel vibrant rather than overly sugary. Their season is brief, but if you find them fresh, they’re worth every minute spent pitting.
Frozen sour cherries are an excellent alternative and work beautifully year-round — simply thaw completely and drain away excess juice before using.
If sweet cherries are easier to find, don’t worry. They create a softer, richer finish. Just reduce the sugar slightly and add an extra squeeze of lemon to keep the flavour bright and balanced.
Whichever variety you choose, look for fruit that tastes good enough to eat straight from the bowl — because that flavour only becomes more concentrated in the oven.
Simple Ways to Make It Your Own
This galette welcomes a little improvisation.
-
Use sweet cherries instead of sour for a softer, jammier filling — simply ease back on the sugar.
-
Swap the vinegar in the pastry for lemon juice or apple cider vinegar to maintain tenderness.
-
Replace cornstarch with arrowroot or tapioca starch for the same glossy finish.
-
Finish with coarse sugar for extra sparkle and crunch across the crust.
-
Add extra flavour with orange zest, a pinch of cinnamon or a spoonful of cherry jam folded into the fruit.
The beauty of a galette is that it never demands perfection.
Serving Ideas
This dessert was made to be served warm.
A generous scoop of vanilla ice cream is almost essential — cool, creamy and slowly melting into the warm cherries and crisp pastry.
For something more indulgent, try:
-
Soft whipped cream with vanilla bean
-
Lightly sweetened mascarpone
-
Thick crème fraîche
-
A drizzle of warm honey
-
A dusting of icing sugar just before serving
Pair it with strong coffee, Earl Grey tea or a chilled dessert wine and suddenly an ordinary evening feels like an occasion.
Storing & Making Ahead
Best enjoyed fresh
Cherry galette is at its absolute peak on the day it’s baked, when the pastry is at its flakiest and the filling still slightly warm.
Keeping leftovers
Store loosely covered at room temperature for up to two days. To revive the crust, warm in the oven for 8–10 minutes until crisp again.
Refrigerating
Keep refrigerated for up to four days in an airtight container. The pastry softens slightly, but the filling becomes beautifully rich and jammy.
Prepare ahead
The pastry can be made in advance and chilled for up to three days, or frozen for up to three months.
When ready to bake, simply thaw overnight in the fridge, roll, fill and bake fresh.
Because sometimes the most impressive desserts are the ones that look beautifully unfinished.
Prepare
Cook
Serving
Ingredients
For the Buttery All-Butter Pastry
A crisp, flaky pastry that bakes into delicate golden layers and gives the galette its signature rustic finish.
-
500g premium plain flour (such as King Arthur All-Purpose Flour)
-
1½ tbsp caster sugar
-
1¼ tsp fine sea salt
-
1 large free-range egg
-
1 tsp apple cider vinegar
-
135ml ice-cold water, plus 1 tbsp if needed
-
340g cold unsalted butter (preferably European-style), cut into small cubes
For the Vanilla Cherry Filling
Sweet, glossy cherries lifted with almond, vanilla and a bright squeeze of lemon.
-
900g fresh cherries, pitted and halved
-
100g caster sugar
-
3½ tbsp cornflour
-
¼ tsp kosher salt or fine sea salt
-
1 tsp pure vanilla extract
-
¼ tsp almond extract
-
1 tbsp freshly squeezed lemon juice
-
30g unsalted butter, cut into small cubes
To Finish & Bake
For that deeply golden crust and sparkling bakery-style finish.
-
1 free-range egg, beaten with 1 tsp water (for egg wash)
-
2 tbsp coarse demerara or turbinado sugar
To Serve
The final touch — simple and completely worth it.
-
Generous scoops of vanilla bean ice cream
(something rich and creamy with visible vanilla specks works beautifully)
Optional Finishing Touches
If you want to make it feel a little more special:
-
Fresh cherry halves scattered over the finished galette
-
A dusting of icing sugar
-
Extra lemon zest
-
Lightly whipped cream or mascarpone
-
Toasted flaked almonds for added crunch
Method
Step 1 — Make the All-Butter Pastry
A good galette starts with exceptional pastry — buttery, flaky and just rustic enough to feel effortless.
Place the flour, sugar and sea salt into a food processor and pulse briefly to combine.
Scatter in the cold butter cubes and pulse in short bursts until the mixture resembles coarse breadcrumbs with visible pea-sized pieces of butter throughout. Those small pockets of butter are what create delicate layers and that deeply satisfying crisp finish once baked.
In a separate jug, whisk together the egg, apple cider vinegar and ice-cold water.
Pour the liquid mixture into the processor and pulse only until the dough begins to clump together into soft, shaggy pieces. Avoid overworking the dough — less handling means a lighter, flakier pastry.
Turn everything out onto a lightly floured surface and gently bring the dough together with your hands. Shape into a thick disc, wrap well and chill for at least 30 minutes.
While the pastry rests, prepare the filling.
Step 2 — Prepare the Cherry Filling
This is where the galette begins to smell like summer.
Place the pitted cherries into a large mixing bowl and add the sugar, cornflour, salt, vanilla, almond extract and lemon juice.
Gently fold everything together until the fruit is glossy and evenly coated.
Leave the filling to rest for around 10–15 minutes while the dough chills. As the cherries sit, they release their juices and soften slightly, creating a richer, more concentrated flavour once baked.
The cornflour will absorb those juices in the oven and transform them into a beautifully glossy filling rather than letting them escape into the pastry.
Step 3 — Roll, Fill & Assemble
Preheat the oven to 200°C (180°C fan) and line a large baking tray with parchment paper.
Lightly flour your work surface and roll the chilled dough into a rough circle approximately 30–35cm wide and around 5mm thick.
Don’t aim for perfection — uneven edges and soft curves are exactly what give a galette its character.
Transfer the pastry to the prepared tray.
Spoon the cherry filling into the centre, leaving a generous 5cm border around the edge.
Scatter the small cubes of butter across the cherries. As the galette bakes, the butter melts into the fruit, creating a richer, silkier filling.
Step 4 — Fold & Finish
Now for the part that makes a galette feel beautifully handmade.
Lift sections of pastry and fold them gently over the edge of the filling, overlapping slightly as you move around the circle to create loose, natural pleats.
The centre should remain open with flashes of cherry visible through the middle.
Whisk together the egg and water to make your egg wash.
Brush generously over the exposed pastry and finish with a generous scattering of coarse sugar.
This final layer gives the crust its deep golden colour and that delicate bakery-style crunch.
Step 5 — Bake Until Deeply Golden
Bake for 40–45 minutes, until the pastry is richly golden and the cherry juices are bubbling slowly at the edges.
Your kitchen should smell of butter, vanilla and warm fruit.
Remove from the oven and allow the galette to rest for at least 15 minutes before slicing. This gives the filling time to settle and makes serving far easier.
Serve slightly warm with generous scoops of vanilla bean ice cream and watch it melt into the cherries and crisp pastry.
Because desserts this good are never meant to be eaten cold.
Kitchen Notes
Keep everything cold
The secret to deeply flaky pastry is temperature. Cold butter + cold water + chilled dough = visible layers and crisp edges. If the dough ever starts feeling soft while rolling, pop it back into the fridge for 10–15 minutes.
Don’t overwork the pastry
Stop mixing the moment the dough starts coming together. You should still see streaks and small pieces of butter throughout — smooth dough makes a flatter, tougher crust.
Chill before baking
Once assembled, place the finished galette into the fridge for 15–20 minutes before it goes into the oven. It helps the pastry hold its shape and gives cleaner folds.
Macerate the cherries
Leave the filling to sit for 10–15 minutes before assembling. The fruit releases its juices and the flavours become more rounded and concentrated.
Drain excess cherry juice
If your cherries release lots of liquid, spoon off a little before filling. Too much moisture is the fastest route to a soggy base.
Build a moisture barrier
Scatter a tablespoon of ground almonds, fine breadcrumbs or a light dusting of flour onto the centre of the pastry before adding the fruit. It quietly absorbs excess juice and keeps the base crisp.
Butter the fruit, not the pastry
Dot the butter directly across the cherries rather than around the folds — it enriches the filling without making the crust greasy.
Fold loosely, not tightly
A galette should look relaxed. Tight folds trap steam and can make the pastry heavy.
Don’t skip the sugar finish
Turbinado or demerara sugar isn’t just decorative — it creates tiny caramelised pockets and gives that proper bakery-style crunch.
Bake low in the oven
Position the tray on the lower-middle shelf. It encourages the underside to crisp while the fruit bubbles gently on top.
Trust colour over time
Every oven behaves differently. You’re looking for deep golden pastry and slow bubbling fruit, not simply the timer hitting 45 minutes.
Let it rest before slicing
The hardest step. Give it 15–20 minutes. The filling thickens, the crust stays crisp and your slices hold together beautifully.
Finish with lemon at the end
A tiny squeeze of fresh lemon over the warm cherries just before serving wakes everything up and makes the fruit taste brighter.
Ice cream rule
Serve the galette warm — not hot. You want the ice cream to soften into the fruit, not disappear instantly.
My favourite trick for this specific recipe: brush the folded crust with egg wash twice (once before chilling, once right before baking) — the colour and shine are unreal.

Print & Share
Rustic Cherry Galette with Vanilla & Almond
Ingredients
Method
-
Begin with the pastry — the quiet hero of a great galette.
-
Add the flour, sugar and sea salt to a food processor and pulse briefly to combine.
-
Scatter in the cold butter and pulse until the mixture resembles rough breadcrumbs with visible pea-sized pieces of butter still running through it. Don’t chase perfection here — those pockets of butter are exactly what create the flaky, layered texture once baked.
-
In a separate bowl, whisk together the egg, apple cider vinegar and ice-cold water until smooth.
-
Pour the liquid into the flour mixture and pulse gently until the dough just begins to gather into soft, shaggy clumps. Resist overmixing; a light hand rewards you with delicate pastry.
-
Tip the dough onto a lightly floured surface and gently bring it together into a thick disc.
-
Wrap and chill for at least **30 minutes** while the filling comes together.
-
Place the prepared cherries into a large bowl and add the sugar, cornflour, salt, vanilla extract, almond extract and lemon juice.
-
Fold everything together until every piece of fruit is lightly coated and glossy.
-
Leave the bowl to stand for **10–15 minutes**.
-
This short rest allows the cherries to soften slightly and release some of their natural juices while the flavours settle together. The cornflour will absorb those juices during baking and create a beautifully glossy filling rather than a runny centre.
-
Preheat the oven to **200°C (180°C fan)** and line a large baking tray with baking parchment.
-
Remove the chilled pastry and roll it out on a lightly floured surface into a rough circle around **30–35cm across** and approximately **5mm thick**.
-
Remember — this is a galette, not a pie. Uneven edges and imperfect curves are part of its charm.
-
Transfer the pastry to the prepared tray.
-
Spoon the cherry filling into the centre, leaving a generous border around the outside.
-
Dot the fruit with the cubes of butter. As the galette bakes, the butter melts into the cherries and gives the filling a richer, silkier finish.
-
Lift the pastry edge and fold it gently over the fruit, working your way around to create loose, natural pleats.
-
Leave the centre exposed so the deep red cherries remain visible.
-
Whisk together the egg and water to make an egg wash.
-
Brush generously across the exposed pastry and finish with a scattering of coarse sugar.
-
As it bakes, the sugar caramelises slightly and gives the crust its signature sparkle and delicate crunch.
-
Bake for **40–45 minutes**, until the pastry is deeply golden and the cherry filling is bubbling lazily at the edges.
-
Remove from the oven and allow the galette to rest on the tray for **15–20 minutes**.
-
This final pause matters — the filling thickens, the pastry settles and the slices hold beautifully.
-
Serve warm rather than piping hot.
-
Finish with generous scoops of vanilla bean ice cream and let it melt slowly into the buttery folds and glossy cherries.
-
A little messy, beautifully imperfect and exactly as a galette should be.
Discover more from Table Number Seven
Subscribe to get the latest posts sent to your email.