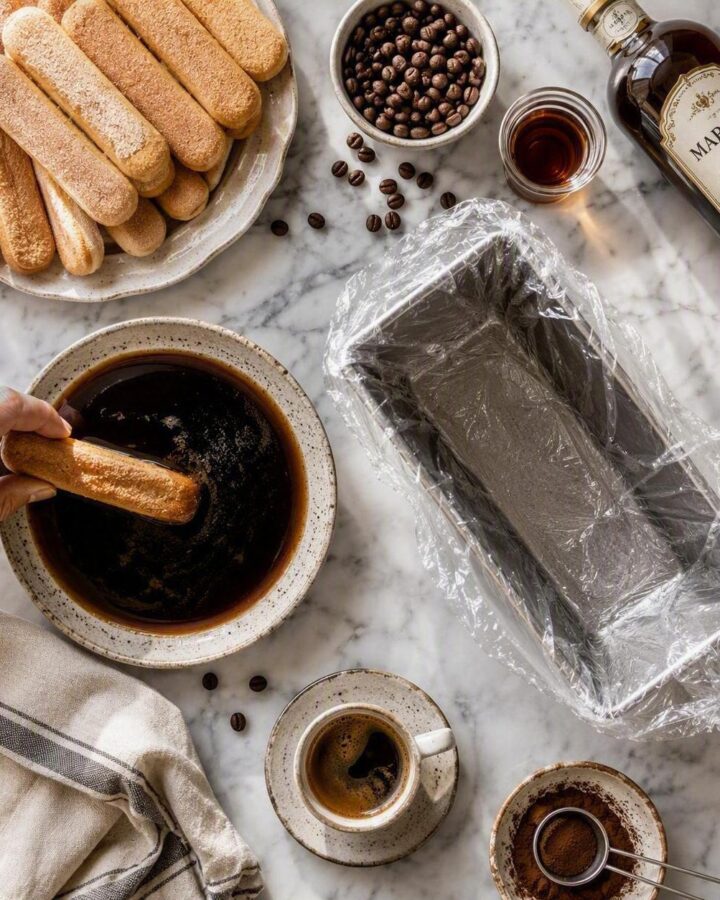
Line a 900g/2lb loaf tin with cling film — give yourself plenty of overhang so you can lift this beauty out later like the dessert magician you are.
Stir the espresso together with the Marsala or coffee liqueur in a deep plate. It should smell like an Italian café at 9pm. If you casually inhale it for a second, that’s normal.
Take the salted caramel ice cream out of the freezer and let it sit for 10–15 minutes. You want it soft and scoopable, not a wrestling match.
Now for the fun part: one by one, dip half the sponge fingers into the coffee mixture — quick dunk, not a long swim — and lay them snugly in the bottom of your tin. Trim if needed. We’re aiming for neat layers, not biscuit chaos.
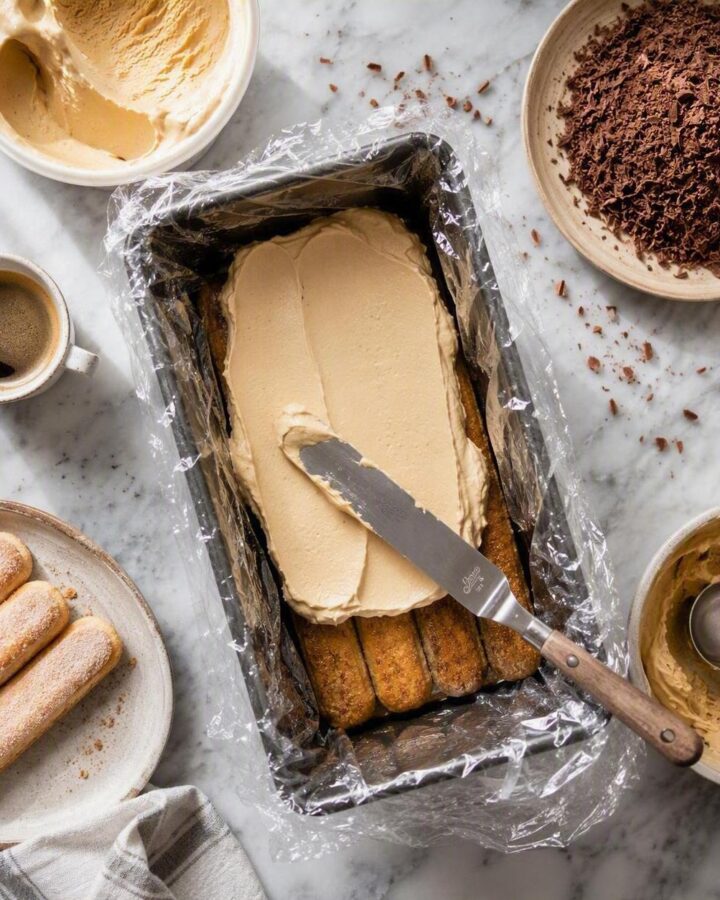
Spoon over the softened caramel ice cream and smooth it out with a palette knife like you absolutely know what you’re doing. Scatter over the grated chocolate — dramatic little flecks of joy — then pop the whole thing into the freezer for 20 minutes to firm up.
Next, let the coffee ice cream soften for 10–15 minutes while you repeat the dunking ritual with the remaining sponge fingers. Lay them over the chocolate layer, drizzle over the caramel in glossy ribbons, then pile on the coffee ice cream. Smooth the top so it looks satisfyingly sharp.
Cover and freeze for 2–3 hours, or until completely firm.
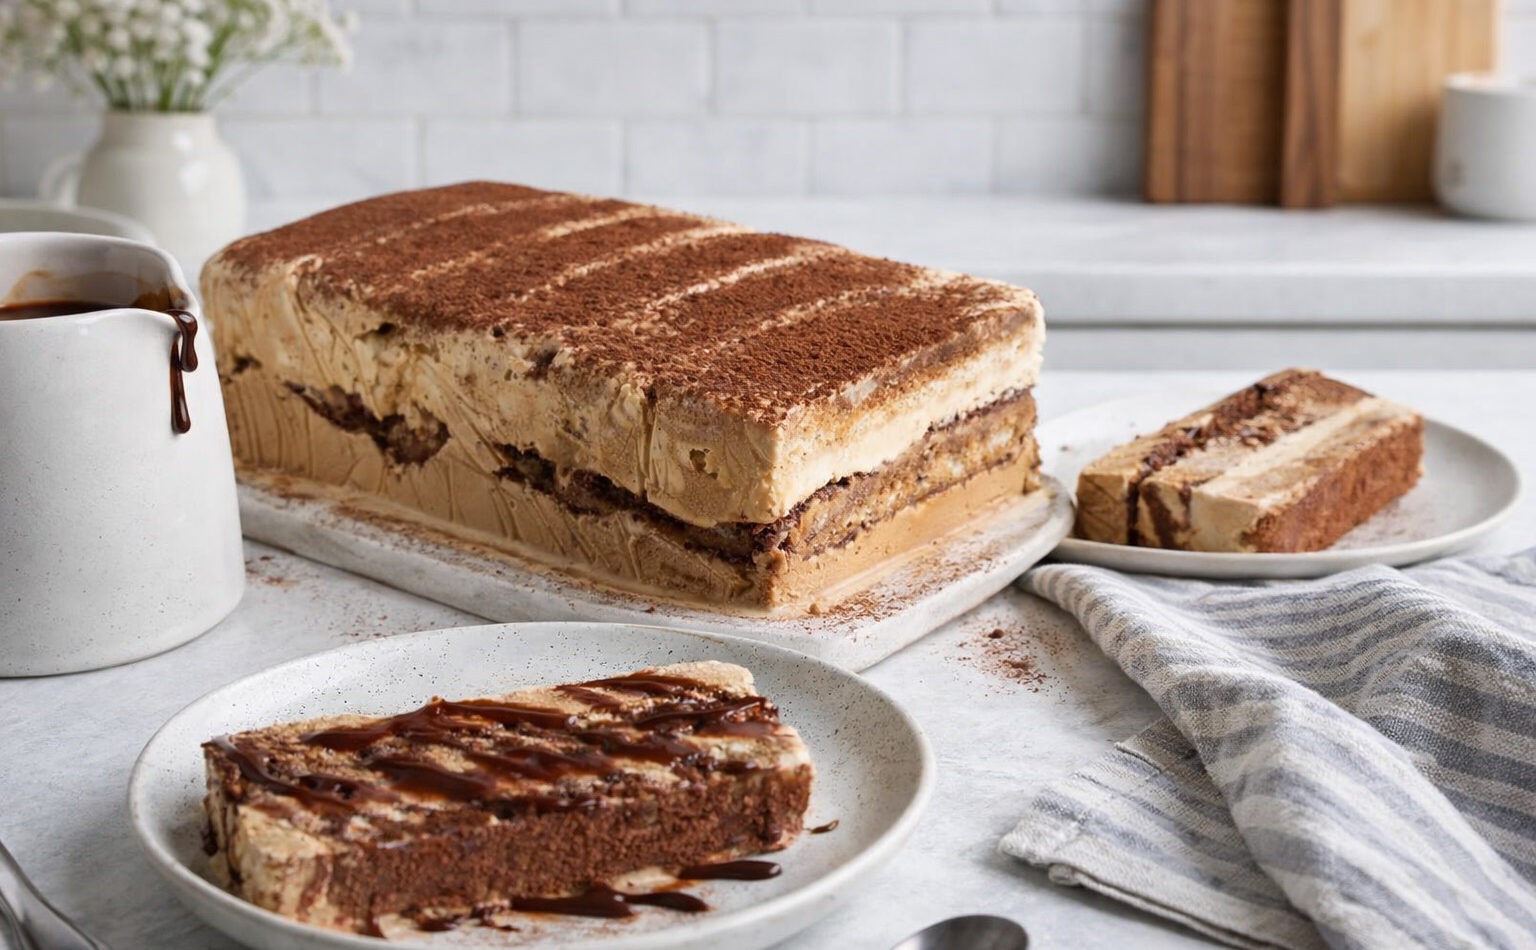
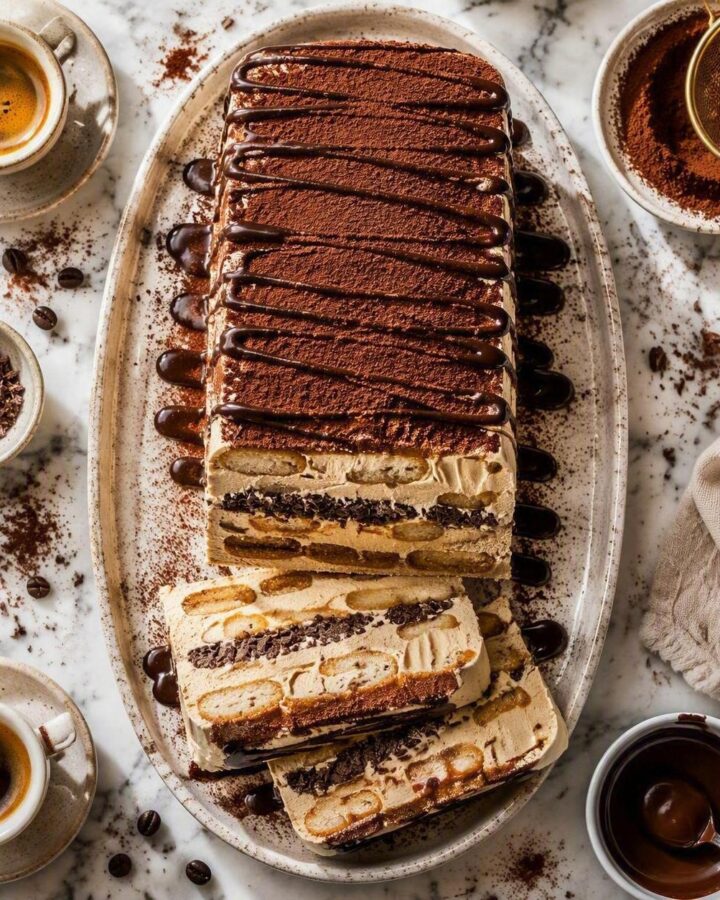
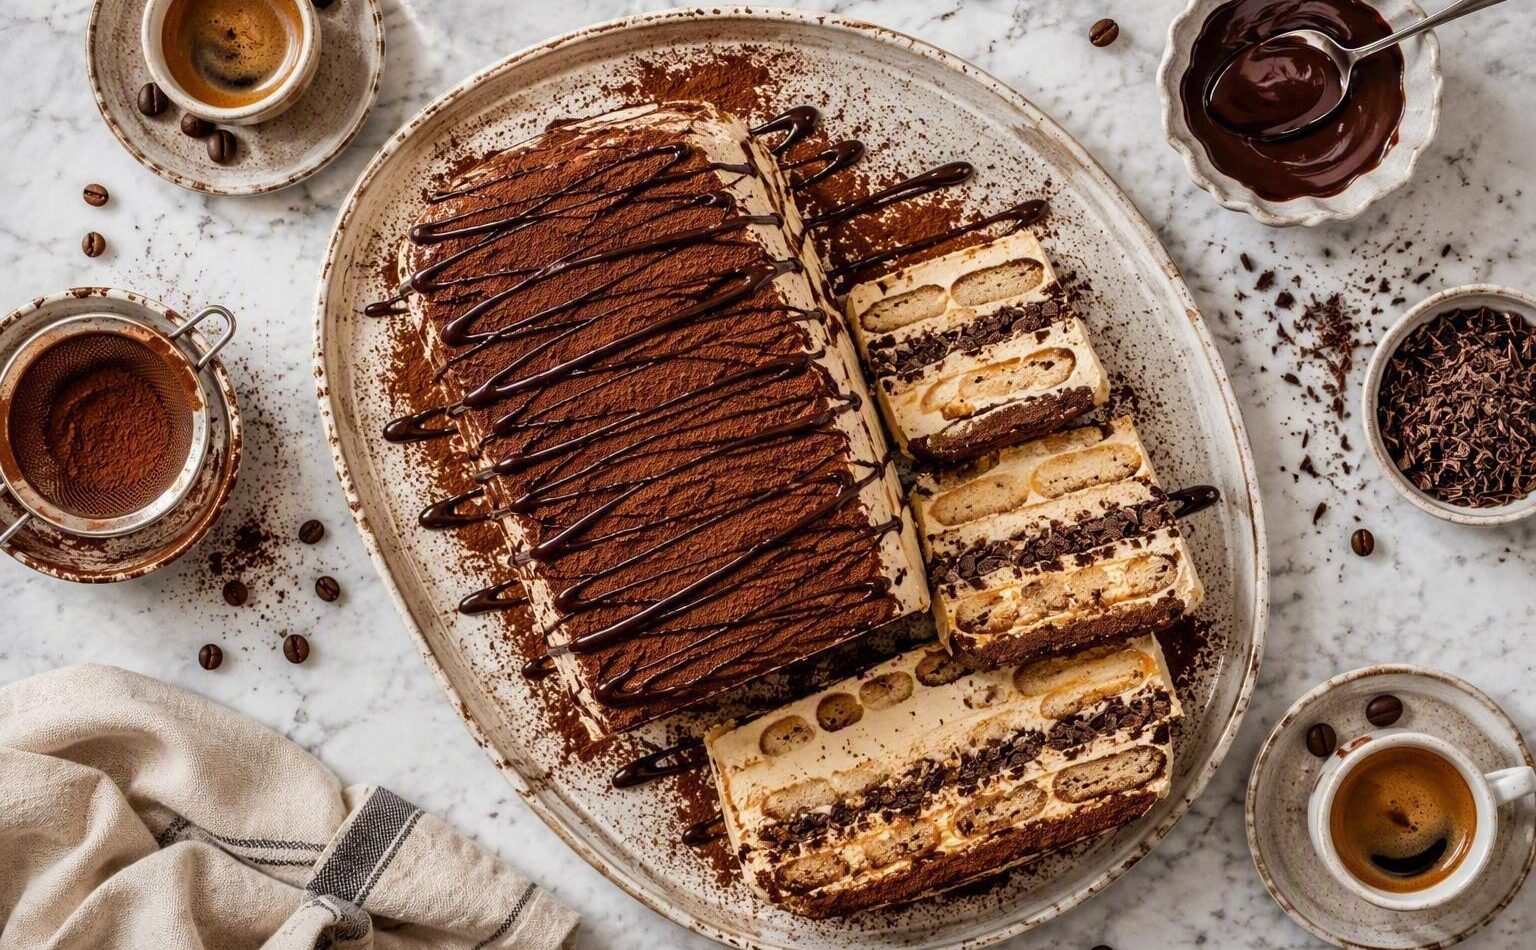
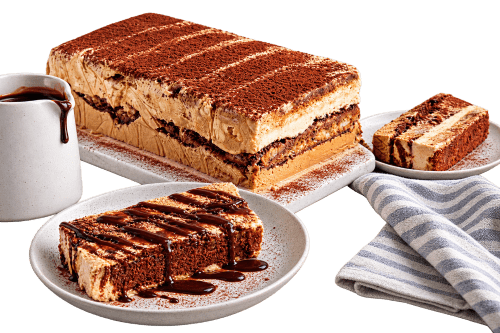
When you’re ready to serve, flip the tin onto a plate, peel away the cling film with a flourish, and dust generously with cocoa powder. Slice thick. Drizzle with chocolate sauce. Try not to look smug when everyone goes quiet after the first bite.
A few details make all the difference
01
Dunk the Sponge Fingers Quickly
The coffee-soaked sponge fingers create the classic tiramisu flavour, but they should only take a swift dip. Too much soaking and they'll become soggy rather than providing structure and texture between the ice cream layers.
02
Work with Softened Ice Cream for Smooth Layers
Allow both ice creams to soften slightly before spreading. This creates beautiful, even layers and prevents tearing the coffee-soaked biscuits underneath.
03
Finish with Plenty of Cocoa and Chocolate Sauce
The final dusting of cocoa powder transforms the frozen loaf into a true tiramisu-inspired showstopper. Add chocolate sauce just before serving for contrast, richness and visual drama.
Why this recipe works
It’s rich, it’s dramatic, and it was absolutely made to be sliced thick and shared with friends (or “shared” — no judgement here).
Cook’s notes
The Sponge Fingers Need a Quick Dunk
Ladyfingers absorb liquid surprisingly fast. Dip them into the espresso mixture for just a second or two. Too long and they'll become soggy, making the loaf difficult to slice cleanly once frozen.
Softened Ice Cream Creates Perfect Layers
Allow each ice cream flavour to soften just enough to spread smoothly. If it's too firm you'll disturb the biscuit layers; if it's too soft you'll lose those beautiful defined stripes when sliced.
Freeze Between Layers for Sharper Definition
That 20-minute freeze after the salted caramel layer isn't just a suggestion. It helps lock everything in place so the caramel ribbons, chocolate layer and coffee ice cream remain distinct and photogenic.
Slice with a Hot Knife
For clean, bakery-worthy slices, dip a sharp knife into hot water and wipe dry before each cut. This glides through the frozen layers and reveals the beautiful coffee-soaked sponge fingers, chocolate flecks and ice cream stripes without crushing them.
Chef's Tip
Make this dessert a full day ahead. An overnight freeze gives the sponge fingers time to absorb the coffee flavour while allowing the ice cream layers to become firm enough for perfect slices and stunning presentation.
Recipe by Flora Ashbury · Published 11 February 2026
Prep120 minsCook—Total120 minsServes8Energy kcal
Method
Line a 900g/2lb loaf tin with cling film — give yourself plenty of overhang so you can lift this beauty out later like the dessert magician you are.
Stir the espresso together with the Marsala or coffee liqueur in a deep plate. It should smell like an Italian café at 9pm. If you casually inhale it for a second, that’s normal.
Take the salted caramel ice cream out of the freezer and let it sit for 10–15 minutes. You want it soft and scoopable, not a wrestling match.
Now for the fun part: one by one, dip half the sponge fingers into the coffee mixture — quick dunk, not a long swim — and lay them snugly in the bottom of your tin. Trim if needed. We’re aiming for neat layers, not biscuit chaos.
Spoon over the softened caramel ice cream and smooth it out with a palette knife like you absolutely know what you’re doing. Scatter over the grated chocolate — dramatic little flecks of joy — then pop the whole thing into the freezer for 20 minutes to firm up.
Next, let the coffee ice cream soften for 10–15 minutes while you repeat the dunking ritual with the remaining sponge fingers. Lay them over the chocolate layer, drizzle over the caramel in glossy ribbons, then pile on the coffee ice cream. Smooth the top so it looks satisfyingly sharp.
Cover and freeze for 2–3 hours, or until completely firm.
When you’re ready to serve, flip the tin onto a plate, peel away the cling film with a flourish, and dust generously with cocoa powder. Slice thick. Drizzle with chocolate sauce. Try not to look smug when everyone goes quiet after the first bite.
Cook’s notes
The Sponge Fingers Need a Quick Dunk: Ladyfingers absorb liquid surprisingly fast. Dip them into the espresso mixture for just a second or two. Too long and they'll become soggy, making the loaf difficult to slice cleanly once frozen.
Softened Ice Cream Creates Perfect Layers: Allow each ice cream flavour to soften just enough to spread smoothly. If it's too firm you'll disturb the biscuit layers; if it's too soft you'll lose those beautiful defined stripes when sliced.
Freeze Between Layers for Sharper Definition: That 20-minute freeze after the salted caramel layer isn't just a suggestion. It helps lock everything in place so the caramel ribbons, chocolate layer and coffee ice cream remain distinct and photogenic.
Slice with a Hot Knife: For clean, bakery-worthy slices, dip a sharp knife into hot water and wipe dry before each cut. This glides through the frozen layers and reveals the beautiful coffee-soaked sponge fingers, chocolate flecks and ice cream stripes without crushing them.
Chef's Tip: Make this dessert a full day ahead. An overnight freeze gives the sponge fingers time to absorb the coffee flavour while allowing the ice cream layers to become firm enough for perfect slices and stunning presentation.
Cooking mode
Dolce Vita Ice Cream Tiramisu
Line a 900g/2lb loaf tin with cling film — give yourself plenty of overhang so you can lift this beauty out later like the dessert magician you are.
Stir the espresso together with the Marsala or coffee liqueur in a deep plate. It should smell like an Italian café at 9pm. If you casually inhale it for a second, that’s normal.
Take the salted caramel ice cream out of the freezer and let it sit for 10–15 minutes. You want it soft and scoopable, not a wrestling match.
Now for the fun part: one by one, dip half the sponge fingers into the coffee mixture — quick dunk, not a long swim — and lay them snugly in the bottom of your tin. Trim if needed. We’re aiming for neat layers, not biscuit chaos.
Spoon over the softened caramel ice cream and smooth it out with a palette knife like you absolutely know what you’re doing. Scatter over the grated chocolate — dramatic little flecks of joy — then pop the whole thing into the freezer for 20 minutes to firm up.
Next, let the coffee ice cream soften for 10–15 minutes while you repeat the dunking ritual with the remaining sponge fingers. Lay them over the chocolate layer, drizzle over the caramel in glossy ribbons, then pile on the coffee ice cream. Smooth the top so it looks satisfyingly sharp.
Cover and freeze for 2–3 hours, or until completely firm.
When you’re ready to serve, flip the tin onto a plate, peel away the cling film with a flourish, and dust generously with cocoa powder. Slice thick. Drizzle with chocolate sauce. Try not to look smug when everyone goes quiet after the first bite.
A letter from table number seven
Something delicious for the weekend.
Seasonal recipes and stories, delivered occasionally.
error: Content is protected !!
We use cookies to ensure that we give you the best experience on our website. If you continue to use this site we will assume that you are happy with it.