Search by recipe name, ingredient, category or feature.
Cheeky Chocolate Easter Nests
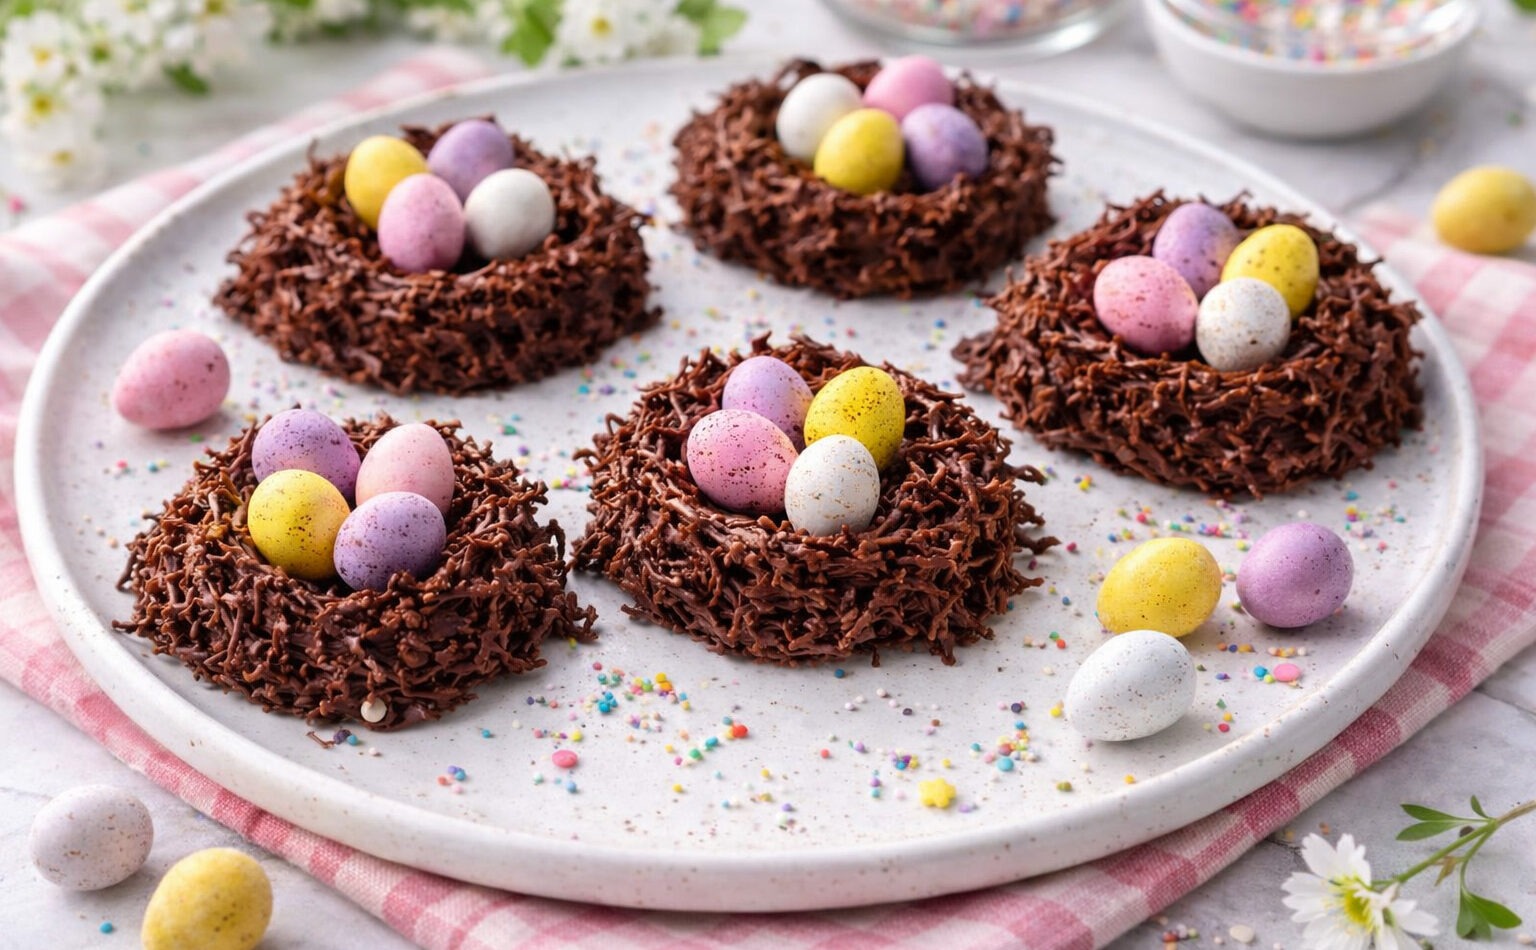
There are so many ways to make chocolate nests, but this is my personal favourite. I love using a mix of milk and dark chocolate for balance, Shredded Wheat for that proper twiggy crunch, and finishing with a generous mix of Easter chocolates on top — because variety is essential and restraint is overrated.
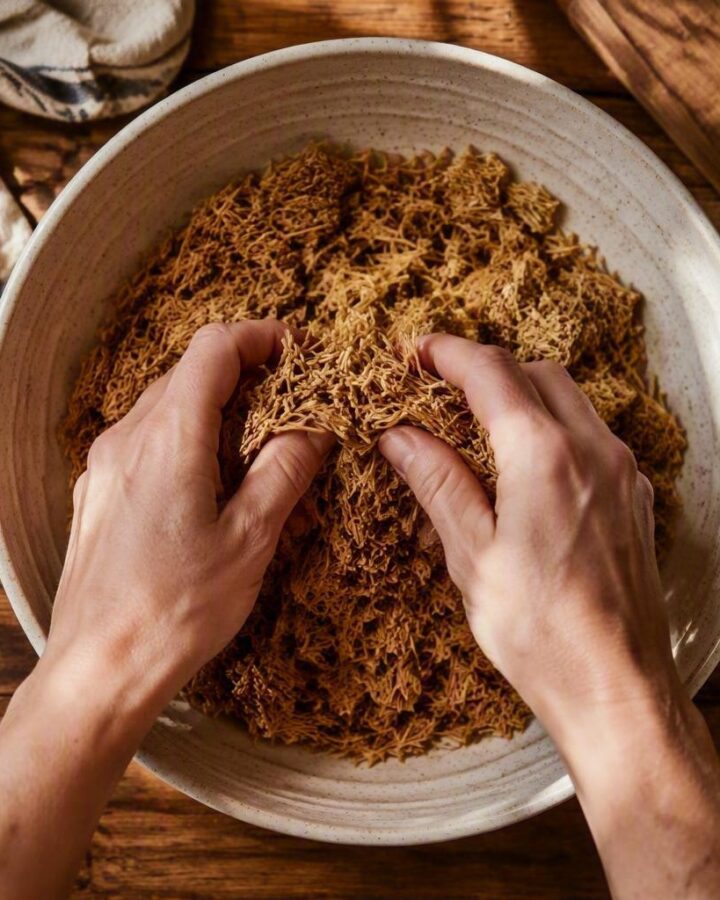
Get crushing. Tip your Shredded Wheat into a large bowl and crush it with your hands into rustic little twigs. Not dust — we want texture. Think bird-built, but chic.
Melt the magic. Add the butter and golden syrup to a pan and heat gently, stirring now and then, until the butter melts into a glossy, golden puddle. Low and slow — no rushing the good stuff.
Chocolate time. Take the pan off the heat and tumble in your finely chopped milk and dark chocolate. Stir patiently until it melts into a smooth, shiny river of chocolatey bliss.
Bring it together. Pour that molten mixture over your crushed cereal and mix until every twig is coated in chocolate. It should look gloriously messy and irresistible.
Shape your nests. Using two spoons (or a cookie/ice cream scoop if you’re feeling efficient), scoop little mounds onto a lined tray. Gently nudge the centre to create that classic nest shape.
Crown them. Press three Easter eggs into the middle of each nest — or more, we’re not judging. This is your moment.
Chill out. Pop them in the fridge until set and firm. The hardest part? Waiting.
Devour.Once solid, try to eat just one.
A few details make all the difference
01
Crush for Texture, Not Dust
The secret to realistic-looking nests is keeping the Shredded Wheat slightly chunky. Over-crushing turns the mixture dense and loses that twiggy nest appearance.
02
Melt the Chocolate Off the Heat
Once the butter and golden syrup have melted together, remove the pan from the heat before adding the chocolate. The residual warmth melts it smoothly and prevents the chocolate from becoming grainy or overheating.
03
Shape While the Mixture is Still Warm
Work quickly once the cereal is coated. The mixture is easiest to mould into nest shapes before the chocolate begins to set. Use the back of a spoon to create a neat hollow for the Easter eggs.
Why this recipe works
Let’s be honest — this is one of those recipes. The kind everyone has made. The kind that appears in every school classroom, every nan’s kitchen, every Easter bake sale since the dawn of time. I can confirm with confidence: they still hit exactly the same. Maybe even better. Give me one and I’m happy. Give me five and I’m thriving.
Cook’s notes
Mix it up
I love using a mix of dark and milk chocolate for that perfect balance — rich but still creamy. But honestly? Make it your own. Go all dark (around 350g) for something deeper and less sweet, or all milk (about 500g) if you’re leaning full nostalgic comfort. Or play around with your own blend — there are no chocolate police here.
Get crushing. Tip your Shredded Wheat into a large bowl and crush it with your hands into rustic little twigs. Not dust — we want texture. Think bird-built, but chic.
Melt the magic. Add the butter and golden syrup to a pan and heat gently, stirring now and then, until the butter melts into a glossy, golden puddle. Low and slow — no rushing the good stuff.
Chocolate time. Take the pan off the heat and tumble in your finely chopped milk and dark chocolate. Stir patiently until it melts into a smooth, shiny river of chocolatey bliss.
Bring it together. Pour that molten mixture over your crushed cereal and mix until every twig is coated in chocolate. It should look gloriously messy and irresistible.
Shape your nests. Using two spoons (or a cookie/ice cream scoop if you’re feeling efficient), scoop little mounds onto a lined tray. Gently nudge the centre to create that classic nest shape.
Crown them. Press three Easter eggs into the middle of each nest — or more, we’re not judging. This is your moment.
Chill out. Pop them in the fridge until set and firm. The hardest part? Waiting.
Devour.Once solid, try to eat just one.
Cook’s notes
Mix it up: I love using a mix of dark and milk chocolate for that perfect balance — rich but still creamy. But honestly? Make it your own. Go all dark (around 350g) for something deeper and less sweet, or all milk (about 500g) if you’re leaning full nostalgic comfort. Or play around with your own blend — there are no chocolate police here.
Cooking mode
Cheeky Chocolate Easter Nests
Get crushing. Tip your Shredded Wheat into a large bowl and crush it with your hands into rustic little twigs. Not dust — we want texture. Think bird-built, but chic.
Melt the magic. Add the butter and golden syrup to a pan and heat gently, stirring now and then, until the butter melts into a glossy, golden puddle. Low and slow — no rushing the good stuff.
Chocolate time. Take the pan off the heat and tumble in your finely chopped milk and dark chocolate. Stir patiently until it melts into a smooth, shiny river of chocolatey bliss.
Bring it together. Pour that molten mixture over your crushed cereal and mix until every twig is coated in chocolate. It should look gloriously messy and irresistible.
Shape your nests. Using two spoons (or a cookie/ice cream scoop if you’re feeling efficient), scoop little mounds onto a lined tray. Gently nudge the centre to create that classic nest shape.
Crown them. Press three Easter eggs into the middle of each nest — or more, we’re not judging. This is your moment.
Chill out. Pop them in the fridge until set and firm. The hardest part? Waiting.
Devour.Once solid, try to eat just one.
A letter from table number seven
Something delicious for the weekend.
Seasonal recipes and stories, delivered occasionally.
error: Content is protected !!
We use cookies to ensure that we give you the best experience on our website. If you continue to use this site we will assume that you are happy with it.